Wednesday 9 April 2014

Eat-Clean Recipe :: Vegan Wild Rice Bibimbap

Korean food has always been a comforting one for me, I meant what could be better than having a pipping hot bowl of Korean kimchi tofu soup on a rainy day right? Or devouring on a bowl of cold Bibimbap when you feel too lazy to warm up the assorted vegetables. 

Sadly, however, Korean food tends to be heavy on salt, hence, the reason why Kimchi soup is always tasty, or high in carbs with the excess amount of rice they used in just a bowl of Bibimbap that is meant for one serving.

But today, I can assure you that your Korean foodie would thank me because I am going to introduce this food called, Wild "Rice".

So what exactly is Wild Rice?


"Wild rice is a special type of edible grass, which is an excellent low fat, high fiber grain. The rice has a dark chocolate-like color, and gives a nutty, smokey taste due to the outer case it retains after harvesting. It is a good source of carbohydrates which supply energy to the body, and contains protein and dietary fiber."

For real, edible grass? Yes, but does it taste like grass? No. Wild rice resemble rice in terms of the appearance and taste because it is a grain-producing grass. On the other hand, nutrients-wise, Wild rice tops the list because it is low in calorie and high in fiber (it's edible grass, remember?).

I simply love the nutty, gritty texture of Wild rice. Nonetheless, you can always mix it with Brown rice to have a lower in calorie source of carbohydrates, and increase your daily fiber intake.

I got the Bob's Red Mill Wild Rice from Cold Storage for $10.95. I know it's pretty costly, hence, I reckon that you mix it with your brown rice, or consume the single serving (3 tbsp, cooked) of Wild Rice.

Okay, hold your horses, Korean foodie! Here's the healthified-version of Vegan Korean Bibimbap..


Did you know that Sesame oil is hailed highly in Asia context for being a healthy cooking oil? Well, you might find a bottle of it in your kitchen as your mom would have used it in some of her Asian cooking. Sesame oil has the power to unblock arteries, provide cells with essential nourishment, and lower cholesterol. It is also high in linoleic acid which your body cannot produce on its own, making your skin soft and youthful. Please don't start drinking a spoonful of it, girls!

For this recipe, you might question the use of the store-bought Korean hot pepper paste, and Toasted sesame oil. Well, remember, a little goes a long way, hence, I have used these ingredients moderately, instead of completely depriving myself from it. 


Recipe
Ingredients

Wild Rice:

(Single serving of cooked Wild Rice: 1/4 cup)

  • 1/2 cup uncooked Wild Rice, washed
  • 1 1/4 - 1 1/2 cup water

Bibimbap:

  • 1 large carrot, shredded
  • Enoki mushroom, boiled
  • Firm tofu, cut
  • 1 cup bean sprouts, boiled
  • 1 cup spinach leaves, boiled
  • Toasted sesame seeds
  • 1/2 tbsp + 1 tsp Toasted sesame oil 
  • 2 tsp hot water
  • 1 tbsp Korean hot pepper paste
Directions
  1. In a saucepan, pour in the uncooked Wild rice and water. Boil the rice over high heat. Once the water level drops and the rice is visible, turn the heat to low. Cover saucepan and allow the rice to steam for 30 to 45 minutes. Once cooked, the grains split to reveal a purplish-grey interior.
  2. While rice is cooking, start to prepare the vegetables. In a mixing bowl, mix 1/2 tbsp sesame oil and water. Coat all the boiled vegetables with the sesame oil mixture separately and transfer it to a plate. 
  3. Prepare the hot sauce, by mixing hot pepper paste with 1 tsp sesame oil in a small bowl.
  4. Once rice is cooked, spoon in no more than 1/4 cup of the Wild Rice and assemble the bibimbap like shown in the above picture.
  5. Garnish it with toasted sesame seeds.

As usual, I like to keep the carrots raw to get the full nutrients, as well as the firm tofu. If you prefer to have cooked tofu, use a non-stick pan and dry grill the tofu to have a crispy exterior and soft inside. 


Wild rice is pretty versatile, you can have it with a quite a handful of dishes. And there you have it, a healthy carbohydrate source to pair up with your Korean dishes. I am pretty sure your taste bud has been tickled and the Korean foodie in you is begging you to make this. Again, I can't emphasize enough on the importance on consuming some food moderately, because a little goes a long way. 


As always,
eat clean, stay healthy and annyeong!


Sunday 6 April 2014

Eat-Clean Recipe :: Raw Vegan Carrot Cake with Cashew Cream "Cheese"

Being a rookie to the plant-based world, everything seems to amaze me. Don't get me wrong, I don't call myself a vegan simply because veganism is deeply rooted in animal rights and a lifestyle that involves both politics and personal beliefs/ ethics. 

Whereas, the term "plant-based" is generally used to describe something that is healthy and made from whole, plant foods, so as to distinguish from something that is processed. In a scenario; While a plant-based meal would qualify as vegan, as person who follows this diet is not necessarily a vegan, simply because he or she can still wear leather/ fur and have no moral issue with hunting or killing animals for food. 

Hence, it goes back to personal belief. So, as of now, I would use the word "Vegan" now and then to describe something (and not someone) that has an absence of animal products. 

Previously, I have always been eating clean with relative consumption of clean meats like chicken boobies or fish, and no processed food at all. So you may ask, why plant-based lifestyle? Simple answer, I listen to what my body wants. Most of the time, it does not yearn for meat or animal products. However, there would be days where I would consume healthy meat occasionally.

Here is a cookie for you to take, there is no lifestyle that fits one-for-all. Always listen to what your body wants, and never ever let anyone's words influence it. Don't let your body starve for what it yearns for, when it craves for something, eat it if you must but in moderation. 


Today, I am going to share a simple cake recipe that would require you to acquire its unique taste. For someone who has been eating strong flavorful food, this could be a surprise to your taste buds. 


This upclosed picture of the cake does not do it justice, but the flavors do! Allowing the medjool dates and carrots to burst out its natural sweetness, plus the coconut flour to lend the fluffy moisture, is simply delicious. 


Recipe
Ingredients

Cake:
  • 1/2 cup pitted dates, soaked in warm water for 15 minutes and drained
  • 1  small red apples, peeled if desired, cored, and chopped
  • 1/8 cup water
  • 1 tbsp lemon juice
  • 1/2 tsp vanilla extract
  • 1/2 tsp ground cinnamon
  • 1/2 tsp ground nutmeg (optional)
  • 1/4 tsp sea salt
  • 256g, peeled if desired, shredded (about 3 medium carrots)
  • 1/4 cup + 1/8 cup coconut flour
  • Stevia to taste (optional)
Cashew Cream "Cheese":
  • 3/4 cup cashews, soaked for 2 to 4 hours and drained
  • 1/2 cup milk of choice
  • 1 1/2 teaspoons lemon juice
  • 15 drops liquid stevia, or to taste
  • Pinch of sea salt
Directions

Cake:

  1. Combine the drained dates, apple, water, lemon juice, and vanilla in a food processor (or blender) and blend until fairly smooth.
  2. Add the cinnamon, nutmeg, and salt and blend again until combined.
  3. Place the shredded carrots in a large bowl. Add the mixture from the food processor and stir well with a wooden spoon to combine.
  4. Add the coconut flour and stir until the batter is combined and uniform. Taste the batter, and if you think it needs a little more sweetness, add stevia to taste. Set the batter aside for 5 to 10 minutes to allow the coconut flour to absorb the liquid mixture.
  5. Transfer the batter to 5- inch round springform pan (or normal round pan), press it firmly and evenly, and freeze it for 4 hours or refrigerate overnight.

Cashew Cream "Cheese":

  1. Combine the drained cashews, milk, lemon juice, stevia, and salt in a high-speed blender and blend until completely smooth. Taste for sweetness and add additional stevia if desired.
  2. Transfer the mixture to a bowl, cover, and refrigerate until the cake is chilled and ready to frost.
  3. Optional: Sprinkle with additional shredded carrots, raw sliced almonds, crushed peanuts etc.

So there you have it, your first raw cake! Again, you need some time to acquire the taste, and practice makes perfect. Actually, I never knew that raw vegetables could taste so good, it wasn't easy to comprehend the taste at first. Right now, I have been devouring on raw food like salad with raw carrots, baby corns, firm tofu etc. Always give yourself time to adjust your taste buds!

As always,
eat clean and be shredded! 

Eat-Clean Recipe :: Banana Chia Pudding

Have you ever craved for dessert so bad that you just gotta satisfy it no matter rain or shine? But at the back of your mind, you thought of how guilty it would be?

Well ahoy there, welcome aboard, because we are on the same boat!

Did I mention that I have a sweet-tooth, and could totally diss dinner for some deliciously sweet dessert? It's always been a tough one for me. In the past, way before I started out on this journey, I would shamefully have my dessert after my somewhat heavy dinner. And in Singapore, you can find dessert anywhere, everywhere, and talk about cost, just with a dollar, you could easily get your hands on those street ice-cream. You can say, I am guilty as charged for being a dessert monster!

So I am going to spill my secret today to those people who are onboard with me. 


Let's talk about ch-ch-ch-chia seeds for a minute. 

In case you’re not familiar with the trendy superfood, these unprocessed seeds, which come from a desert plant grown in Mexico, have been around for thousands of years and were a staple in the diet of the ancient Mayans and Aztecs. Aztec soldiers used to crush chia on the reg to boost energy, and the seeds were thought to have magical powers based on their ability to increase stamina over long periods of time.


It is considered a “superfood” because of the maximum amount of nutrients with minimal calories. The seeds are packed with vitamins, minerals, and fabulous antioxidants that protect your body against free radicals, prevent cancer, and fight aging. Chia also contains significantly more protein than other whole grains, and it has a ridiculously high fiber content. Two tablespoons of chia seeds contain 11 grams of fiber (40% of your daily value!), which will keep you feeling full and satisfied while improving digestion and regulating blood sugar. Oh yes!


Most importantly, chia seeds are the best plant-based source of omega-3 fatty acids on the planet. Omega-3s are glorious, and because they are not made in our bodies, we need to get them from our diet. These fatty acids help build new cells, reduce inflammation, regulate physiological functions, and prevent heart disease and diabetes. They also reduce depression levels (be happier!), improve cognitive function (be smarter!), and promote healthy skin, hair and nails (be prettier!). What's up, plant-based peeps! 
Another thing for Asians, I am pretty sure you are familiar with Basil Seeds, the one you easily found in the local dessert, yes those black, weird-looking seeds. To clear the air, both have similar characteristics, however, Basil Seeds is bigger as compared, and black in color, found mainly in the Mediterranean and Asia. Now, before I hear people saying how expensive chia seeds can be, you could totally use Basil Seeds instead. Well, obviously it would be great if you could get your hands on Chia Seeds, but Basil Seeds are good for those who are looking for a cheaper alternative.
Alright, enough of me talking, ready for the recipe? 
Aye aye Captain!

Recipe
Ingredients

Basic:
2 cups Unsweetened Soy Milk/ Almond Milk (any preferred milk)
6 tbsp Chia Seeds/ Basil Seeds
1 tsp pure Vanilla extract
Sweetener to taste

Optional Combo:
- Mashed Ripe Banana with Cinnamon 
- Matcha powder with Berries
- Cocoa Powder with Sliced Banana
- Strawberry with Soy Yogurt (greek yogurt for non-vegan)

Directions

In a big bowl, combine all the ingredients and give it a good stir. Transfer to a jar or a sealed container and allow to chill for at least an hour or, best, overnight. 

Note: It takes practice to get the texture "just right", so you can always feel free to adjust the amount of chia seeds used or the milk to achieve the desired texture (thick or thin pudding).


My favorite combo is to mash a very ripe banana (super sweet!) and mix it with the chia pudding, what can I say, purrffecctttt combo! There are simply way too many combos that I can think of but have yet to give it a try, hopefully I can show you some of my unique combos soon. As of now, enjoy this smooth and crunchy pudding as a dessert, or even breakfast. This is perfect to have it on-the-go as well, so now you have no excuse to skip your breakfast! 

I hope you have a clearer understandings regarding these super seeds, and oh don't forget to share with me your favorite combo below..

As always, 
eat clean, and stay fit! 

Tuesday 1 April 2014

Eat-Clean Recipe :: Raw Vegan Rice Paper Rolls

I don’t know about you but I love food that is fresh, easy to make, nutritious and delicious, well, particularly veggies. So, if you are one who hates those greens, look away. This is for those true greens lovers!

As I have mentioned on my previous post, I just found out that I was sensitive to gluten. All this while, for the past few years of my life, I had actually mistaken the symptoms of Gluten Intolerant (or Non-Celiac Gluten Sensitivity) as something normal.

Though there are many symptoms of Gluten Intolerant, these are the few obvious ones that I had experienced:

  1. Digestive issues such as gas, bloatingdiarrhoea and even constipation. This very symptom was the one I completely missed out, thinking that it might be due to the spicy food I had during the meals. 
  2. Keratosis Pilaris, (also known as ‘chicken skin’ on the back of your arms). This tends be as a result of a fatty acid deficiency and vitamin A deficiency secondary to fat-malabsorption caused by gluten damaging the gut. I let this slipped away too, and didn't know it was the obvious symptoms I had overlooked.
Only recently did I feel sick in the stomach whenever I consumed food that contain wheat, specifically, it would get me running to the toilet. Bloating became worse during night time, resulting in sleepless night and major diarrhoea on the next day morning. Thus, I decided to go gluten-free for the next few days to find out whether I truly is gluten-intolerant.

I am sharing this with you is not because I want you to be on gluten-free diet. Not everyone is sensitive to gluten, but if you have been experiencing all these, I suggest you do more research and read about it as currently there is no test for Gluten Sensitivity. 

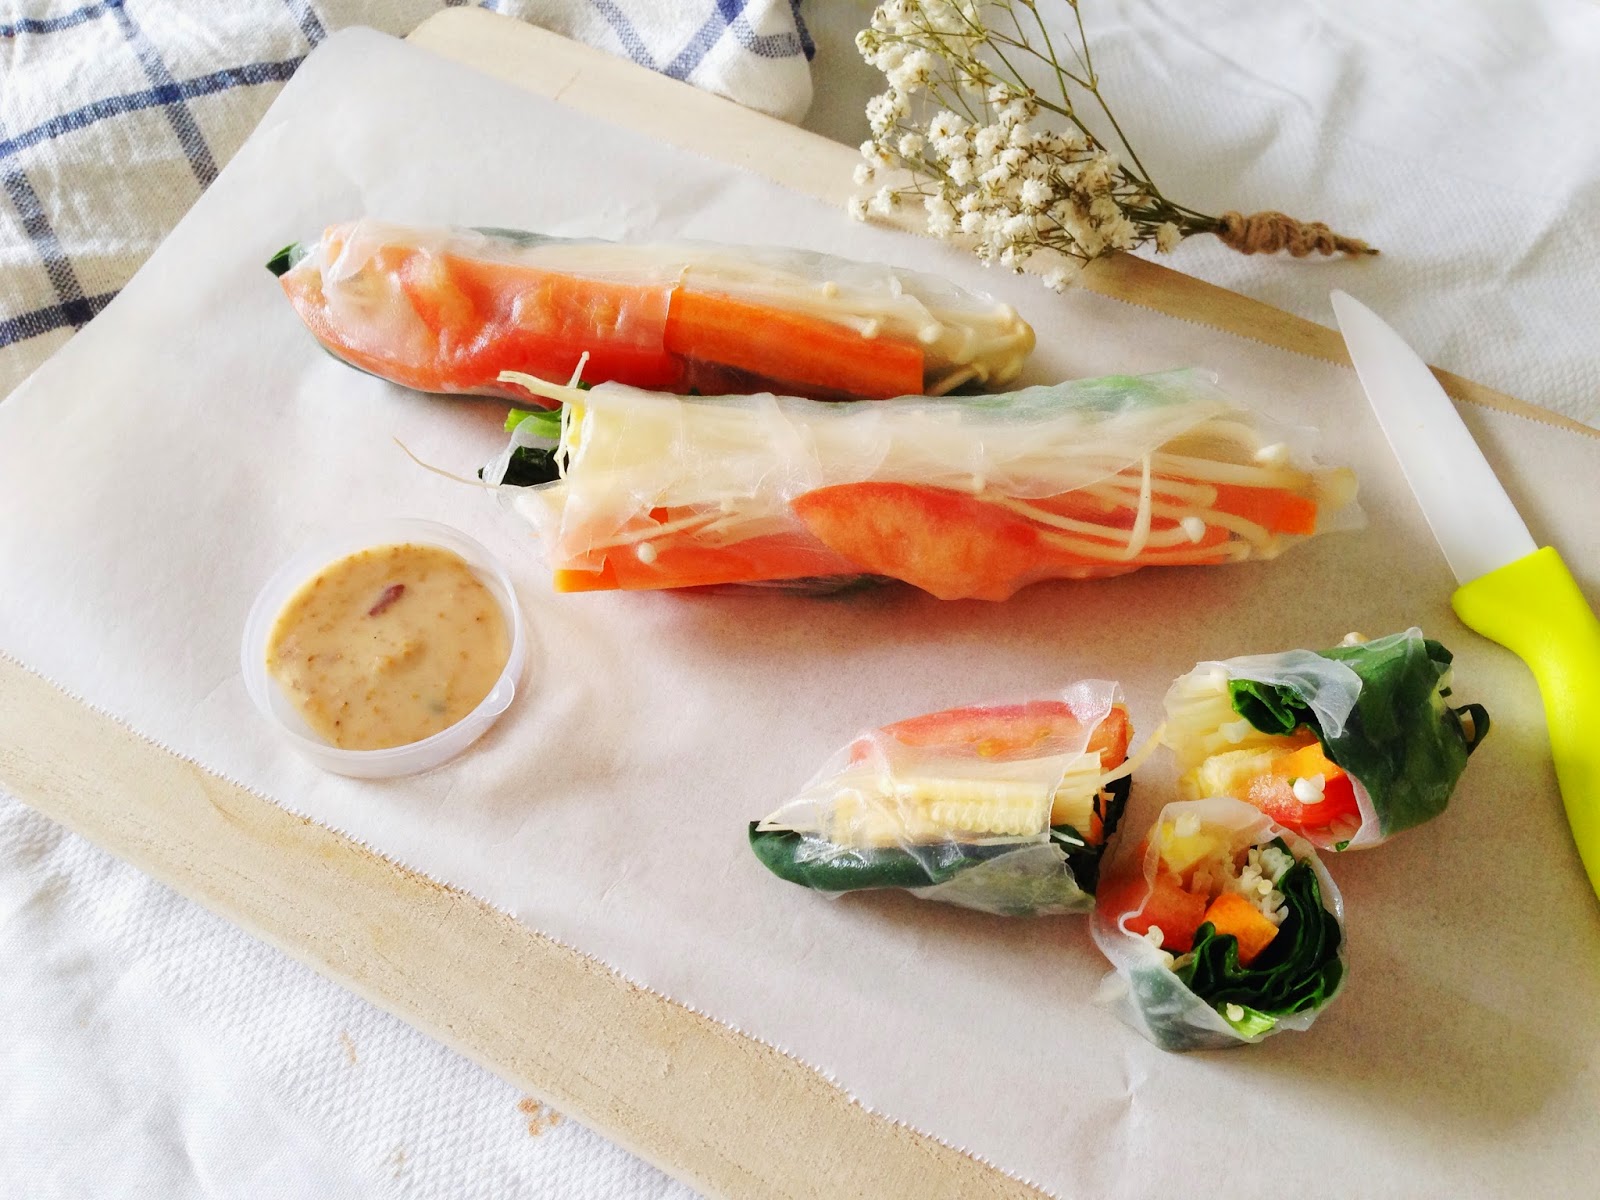
So, to start my gluten-free diet on the right note, I had made some Raw Veggie Vietnamese rice paper rolls. This recipe is good when you want lighten up your meals, and prepare good easy ‘grab and go’ food that can be easily packed and eaten. Plus, it is gluten-free and perfect for any meals.


So let's get rolling!

Recipe:
(Servings: 2)
Ingredients
  • 6 Rice paper sheets 
  • Baby Spinach (or the leafy parts of Chinese spinach is fine)
  • Enoki Mushrooms
  • 1 Baby Corn
  • 1-2 Carrots, peeled
  • 1 tomato, sliced
  • Optional fillings: Cucumbers, Bean Sprouts, Avocado, Spring Onions, Red Bell Pepper etc.
  • For non-vegan fillings: Cooked prawns, or chicken boobies
Directions
  1. Wash all the vegetables and slice the carrots, corn, enoki, and tomatoes. Place all the ingredients in a large plate.
  2. Prepare a bowl with warm water for the rice paper and add a wrap for about 30 seconds, or until pliable
  3. Lay the wrap on a big dry plate, add a little of each veggie slightly towards the bottom
  4. First fold the side of the sheet closest to you (where the ingredients are) to cover the ingredients (this should be a horizontal movement). Then fold one of the vertical sides over half of the roll, then the other side.
  5. Finish rolling the sheet away from your body until you have a complete roll. 
  6. Continue process until all rolls are assembled and place onto serving dish.
Optional dipping Sauce:
- Thai Sweet & Spicy sauce
- Japanese Goma sauce
- Garlic Peanut Butter sauce = minced garlic, and mix with a tablespoon of peanut butter. Add in water until smooth and sauce-liked


I hope you will get rolling too and enjoy the goodness of raw veggies. Whenever I am tired of having salad, this would be my "go-to" recipe for an alternative recipe. There are endless list of methods for this recipe and ingredients you can put inside. 

Perhaps you would like to share some of your ideas, would love to hear it from you!

As always,
eat clean and be beautiful. 

Saturday 29 March 2014

Eat-Clean Recipe :: Crispy Quinoa and Cashew Date Cookies

Hello guys!

Have you ever found serenity and calmness when you're baking? Or the excitement and enthusiasm when you are waiting for the timer to ring off? Because I know I do, but that doesn't mean that girls are meant to be in kitchen all the time lol!

It is just so surreal when I get to try experimenting with new ingredients and it turns out good. I am currently trying out on this unique ingredient called Quinoa [pronounced Keen-Wah]. Pretty sure you have heard it once or twice but never really try it before, am I right to say that?


This superfood is "a grain crop grown primarily for its edible seeds", as stated on Wikipedia, and known to be a high-protein seed, in a way that per 100 calories, it is higher than brown rice, potatoes, barley and millet, but is less than wild rice and oats. Also, it lacks gluten, a.k.a gluten-free food which I will do a separate post on it. Currently, eliminating gluten from my diet (referring to my eating lifestyle), I just found out that I am gluten-intolerance. So, I would update you more about it on another post.

No doubt that Quinoa has just entered my list of superfood. I really reckon you to give it a try by replacing your white rice with this quinoa seed, or making these grain-free, sugar-free and gluten-free cookies recipe that I am going to share today.


Trust me, you won't be able to keep your hands off the cookie jar, 'cos it is happening to me now lol! ;-)

Recipe:
Ingredients: 

  • 1 cup quinoa flour*
  • 1 1/2 cup cashew flour (or almond flour)
  • 1 tbsp Manuka Honey (or pure raw honey)
  • 1/4 cup + 3 tbsp Date Syrup (or 1/4 cup honey, and more to taste)
  • 1 tbsp Applesauce
  • 1 tbsp Macadamia Nut Oil/ Almond Oil/ Grapeseed Oil
  • 1 tsp baking powder
  • 1/4 tsp salt

Directions:

  1. Heat oven to 300°F.
  2. Mix quinoa flour, almond flour, baking powder and salt in a large bowl. Add honey and applesauce until crumbly dough forms. Add the honey slowly, making sure the dough is crumbly. The key is to make sure your dough is crumbly, so you can cut cookies out of the dough. Shape the dough in a ball and refrigerate for 15 minutes.
  3. Lay parchment paper on the kitchen counter, put the dough in the middle and cover with another parchment paper on the top. Gently roll the dough in 1/4 inch thickness. Using cookie cutter make 2 inches circles and place them on parchment paper lined baking sheet. Repeat until you have about 20 to 24 cookies.
  4. Bake cookies for 10 to 15 minutes until golden brown, turning it over after 10 minutes mark.
  5. Let cookies cool completely and store in air-tight container. 


Making Quinoa Flour* :
1. Pour Quinoa to a non-stick pan and put it on a medium heat.
2.Toast the quinoa in a skillet over medium heat for about 5 minutes, stirring occasionally.
3. Quinoa will make a light popping sound, when the toasting begins, for about a minute or two.
4. Let quinoa cool.
5. Add to a food processor and blend on high until you get a fine flour. 

I didn’t want to just be on a diet for a couple of months, I am actually cultivating this healthy lifestyle for  the rest of my life. Right now, I am eating 6-7 small, nutrient-dense meals on 2-3 hours intervals. I realised that meal planning was critical if I wanted to eat 6-7 meals a day! 
The key to eating healthy throughout the day is to keep healthy foods readily available. Trust me, by making your food in advance, you would definitely remain on track without blindly eating whatever food is available in front of your sight. So I learned to make some easy healthy snacks that would satisfy my cravings.

Here's a cookie for you, and as always, eat clean and stay beautiful.


Tuesday 25 March 2014

Eat-Clean Recipe :: Chocolate Protein Oat Waffles

Grattis International Våfflor dagen, killar! Alla älskar våfflor rätt, som inte?
[Happy International Waffles Day, guys! Everyone loves waffles right, who doesn't?] in Swedish

Food makes everyone happy, but what makes me happier and ecstatic is when I can turn those delicious food into a healthier one where everyone can still enjoy it. It's just my new definition of sharing happiness with people like you! :-)

Waffles, waffles, waffles! Brilliant for any meals of the day and never can anyone get bored of it, I meant it's soooo waffle-liciously delicious! Perfect pair with <3 ice-cream <3, peanut butter, nutella, fruits or anything.. it's like heaven on a plate! 

But hold up, how about healthy waffles that's gonna make you feel happier and guilt-free after devouring it? Yes, sounds like we are on the same page. 

To celebrate International Waffle Day (originated from Sweden), I will be sharing waffle recipe today!


You are just "2 steps" away from having a wonderful plate of heavenly waffles, no joke! ;-)


Recipe:
Ingredients: 


  • 1/2 cup oat flour 
  • 1/2 tbsp coconut flour
  • 1 tsp baking powder
  • 1 tsp pure vanilla extract/ powder
  • 1/2 stick stevia (or preferred sweetener)
  • 1 tbsp greek yoghurt
  • 2 tbsp unsweetened applesauce
  • 2 egg whites
  • 3 tbsp unsweetened soy/ almond milk
  • Optional toppings: Strawberry, Berries, Banana, Chocolate Sauce*, Nut Butter, Tahini, Pure Maple Syrup, Honey, Date Syrup, Greek Yogurt etc.
Directions:
  1. Mix all the ingredients in a large bowl, till a thick batter is formed. 
  2. Heat up the waffles maker (make sure it's hot), cook for about 4-5 minutes till golden brown. 
  3. Serves best when it's fresh from the maker!
For Chocolate Sauce*: Mix 1/3 cup unsweetened soy/ almond/ skimmed milk, 1/8 cup unsweetened coconut flakes, 1/4 cup fat free cottage cheese, 1/2 tbsp of unsweetened cocoa powder and honey to taste.

See, it's that simple! If you do not have a waffle maker, you can always turn this into a pancake. Now, who dare says that eating-clean is boring? 

On a side note, I am gonna try to post healthy recipes every fortnight, well, at least this would get you to anticipate for the next recipes. It's worth waiting for these recipes, right right? Again, Happy International Waffle Day, guys! 

As always, 
eat clean and stay beautiful!


Thursday 20 March 2014

Eat-Clean Recipe In A Minute :: Chunky Monkey Overnight Oatmeal In A Jar (OIAJ)

Hey guys!

Now that there are two recipes up on this blog, have you given a shot on those healthy recipes? I hope you did! 

Oatmeal, who doesn't love oatmeal? I know I do! If you haven't noticed, most of my recipes use oat flour or rolled oats, in fact I would try to use it whenever possible and basically put all other flours such as whole wheat flour, or spelt flour aside. 

For today's post, it would be Recipe In A Minute again because I realised something about the people in Singapore. Whenever I am out in the morning, no matter if it is weekday or weekend, Singaporeans (or everyone on the street) would always be in a rush. So, I decided to share more recipes that are easy to prepare (in fact, most of my recipes are quick and simple)!

If you are one of those people who seems to be running out of time in the morning and always failed to have breakfast before leaving the house, then I suggest you give this recipe a try. It requires no baking, really, all you need is a jar, a few ingredients, a fridge and do some harlem shake with the jar (nah no, harlem shake is so last year!! lol). 


This got to be my most favorite Overnight OIAJ, Chunky Monkey. Nothing can go wrong with some nut butter, chocolate, and bananas!

Recipe:
Ingredients 
  • 1/4 cup old fashioned rolled oats
  • 1/3 cup Soy/ Almond/ Skimmed milk
  • 1/4 cup low-fat Greek Yogurt
  • 1-1/2 teaspoons dried chia seeds
  • 1 teaspoon honey (to taste)
  • 1 medium banana
  • 1 tsp Natural Unsweetened Almond Butter/ Peanut Butter
  • Optional: 1 tsp Semi-sweet chocolate chips
Directions: 
  1. In a jar (or a lunchbox), add oats, milk, yogurt, chia seeds, honey, and nut butter.
  2. Put lid on jar and harlem shake until well combined. 
  3. Remove lid, add bananas, and chocolate chips and stir until mixed throughout. 
  4. Return lid to jar and refrigerate overnight or up to 2 days. Eat chilled. 
How much simpler can it get! I always make this whenever I crave for some pudding or maybe, ice-cream (chances are I would go get myself a scoop 'cos I am seriously a sucker for ice-cream, only ice-cream! :-p). I reckon you give this a try, and add in whatever toppings you want to be inside your OIAJ. I will post more OIAJ recipes with different combinations of toppings, hopefully you can also come out with your own unique combooo!

As mentioned earlier on my latest Instagram post, I'm pretty sure that most of you skip breakfast just because you've no time. While some may argue that the importance of breakfast is a myth, I think otherwise. When you skip breakfast, you tend to be hungry before lunch hour, and guess what, you will start to eat more than you should for lunch! And that's bad, so always prepare easy breakfast to avoid over-eating.

Shake your laziness away, and stay healthy! :-)